This project began as an attempt to add an easily accessable, high quality headphone out to my computer. My goal was to add an amplifier in a 5.25" drive bay. I was aware of such products as Creative Lab's Soundblaster Live! Drive, but I was put off by both the price and the additional driver complexity. So I decided the only way to get exactly what I wanted was to build my own.
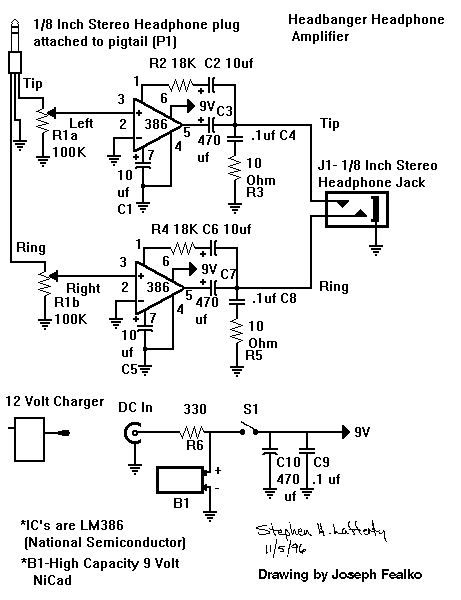
This design is pretty much self explanatory. If you want more information visit Stephen Lafferty's page. Though I left the heart of this design unchanged, I did make a few minor modifications. Most importantly, I added capacitors to the input. Also, in the computer version, I left out the battery and associated charging circuitry in favor of a regulated supply using a 78L09.
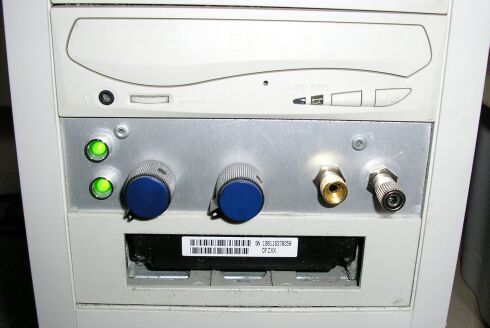
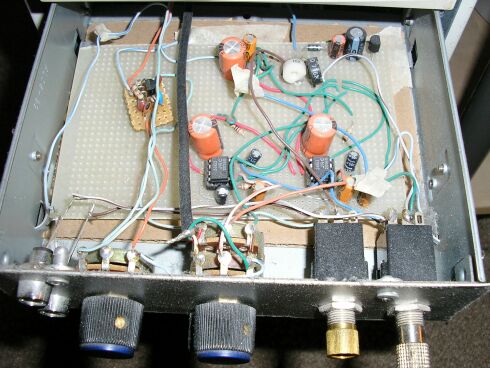
The pictures below show the completed amplifier mounted in a drive bay. For the enclosure, I used the 5.25" rack from a broken SBLive!, and fabricated an aluminium faceplate. The LEDs indicate that a cable is plugged in. Obviously they are not of much use, but it gave me a chance to use up the DPDT switched jacks that I had been sitting one. The two jacks in the pictures are both 1/4". They look funny because I have 1/4" to 1/8" adapters in them. The jack on the left is actually not a headphone output. It's an instrument level input. I used to use it to play bass though my computer (because I didn't have room for a bass amp in the dorms), but now I don't use it much. Impedance matching and a little gain are provided by a little JFET amplifier. The whole thing is powered from the computer's power supply.
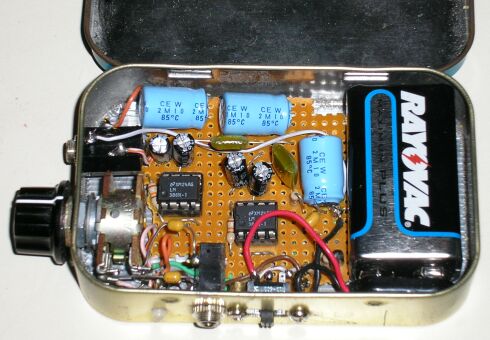
Below is the second headphone amp I made. The circuit is the same as the one above. The Altiods tin provides a rugged and well-shielded case, and it's cool looking.